

How to Thin Out Hair Safely at Home: Step-by-Step Guide for Beginners
Dealing with hair that feels a bit too bulky or heavy? Learning how to thin out hair at home can be a game-changer. It's not as scary as it sounds, especially if you're using the right tools. Thinning shears might look a little intimidating at first, but with a few simple steps, you can tame that excess volume and get a lighter, more manageable look. This guide is for anyone who wants to give their hair a little breathing room without a salon trip.
Key Takeaways
- Always start with clean, dry hair when you're figuring out how to thin out hair. This helps you see exactly where the bulk is and prevents weird, uneven spots.
- Thinning shears are different from regular scissors; they have teeth on one blade to remove less hair at once, giving a softer blend.
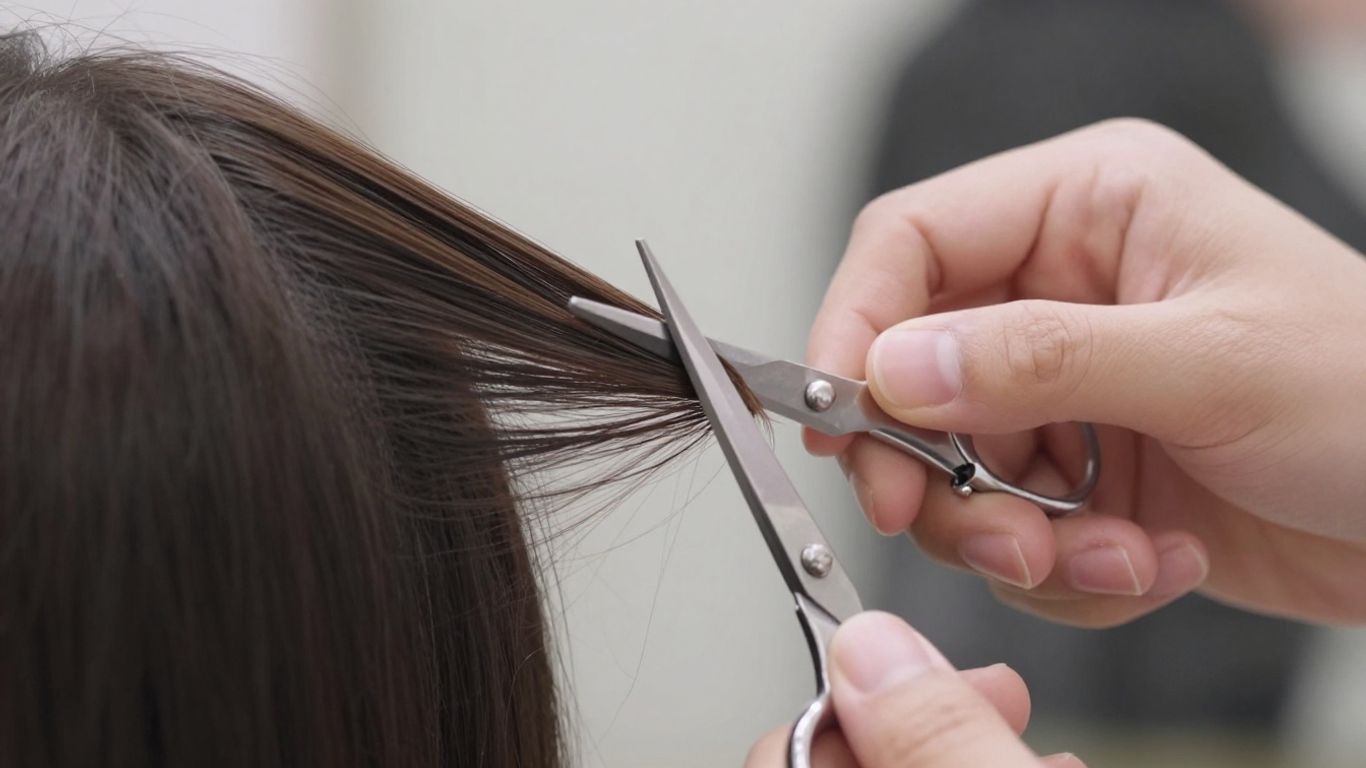
- When thinning, aim for the mid-lengths to ends, and always hold the shears at a 45-degree angle. Never cut close to the roots.
- Go slow! It's better to take out too little hair than too much. You can always go back and thin more, but you can't put it back.
- After thinning, give your hair some love with hydrating products and try to limit heat styling to keep it healthy and looking its best.
Understanding Thinning Shears
What Are Thinning Shears?
Thinning shears are a special kind of scissors made for hairstyling. Unlike regular scissors that cut every single hair they touch, thinning shears have a unique design. One blade has little teeth, like a comb, while the other is smooth. This means when you use them, they cut only some of the hair strands in a section, leaving others to blend in. This is how they help reduce bulk and add texture without making hair look choppy. They're super handy for making thick hair feel lighter or for blending layers so everything looks smooth and natural. Think of them as a tool for adding depth and movement, not just for cutting hair shorter.
Thinning Shears Versus Regular Scissors
It's important to know the difference between thinning shears and the scissors you might use for everyday tasks or even regular haircuts. Regular scissors have two sharp blades that cut everything in their path. They're great for precise cuts, like creating a blunt line or trimming bangs. Thinning shears, on the other hand, are designed to remove hair volume. They don't create a clean cut; instead, they selectively remove strands. This difference is key:
- Regular Scissors: Cut all hair strands for precise lengths and shapes.
- Thinning Shears: Cut only some hair strands to reduce thickness and add texture.
- Texturizing Shears: (Often confused with thinning shears) These have wider teeth and remove even less hair, mainly for adding movement and breaking up solid lines.
Using the wrong type of shear can lead to unwanted results. You wouldn't use a hammer to screw in a nail, right? It's kind of like that with hair tools.
You might be tempted to grab any pair of scissors to thin out your hair, but that's a big mistake. Regular scissors will just leave you with uneven, choppy layers that are really hard to fix. Thinning shears are specifically designed to blend hair and reduce bulk in a way that looks natural. They're the only tool for the job if you want a smooth, less dense result.
When to Use Thinning Shears
So, when is the right time to reach for your thinning shears? They're most useful when you want to:
- Reduce bulk in thick hair: If your hair feels heavy or takes forever to dry, thinning shears can make a big difference.
- Soften harsh lines: After a haircut, if some layers look too distinct, thinning shears can help blend them together for a more natural flow.
- Add texture and movement: They can help give straight hair a bit more life or enhance the natural texture of wavy or curly hair.
- Manage cowlicks or uneven growth: Sometimes, thinning out a specific area can help hair lay more smoothly.
However, it's good to be cautious. If your hair is already very fine or thin, using thinning shears might make it look even sparser. They're also not the best choice for very short, precise haircuts where clean lines are important. Always start with a light hand; you can always take more hair off, but you can't put it back on!
Preparing Your Hair for Thinning

Before you even think about picking up those thinning shears, a little prep work goes a long way. It's not just about grabbing the scissors and going to town; getting your hair ready makes the whole process smoother and the results way better. Trust me, I learned this the hard way.
Starting with Clean, Dry Hair
This is a big one. Always, always start with hair that's clean and completely dry. Wet hair behaves differently, and you won't get an accurate picture of its natural volume or how it falls. When hair is dry, you can see exactly where the bulk is and where you need to make adjustments. Trying to thin wet hair is a recipe for unevenness and potential disaster once it dries. So, wash and dry your hair thoroughly before you begin.
Sectioning Your Hair Effectively
Think of this like painting by numbers, but for your hair. You need to break your hair down into manageable sections. This helps you work systematically and ensures you don't miss spots or accidentally thin the same area twice. Most people find it easiest to start with the bottom layers and work their way up. Use clips to keep the sections you're not currently working on out of the way. This keeps things tidy and gives you much better control over the process.
Grip and Comb Techniques
How you hold the hair and the shears matters. When you take a section of hair to thin, hold it out from your head. You want a bit of tension, but not so much that you're pulling uncomfortably. A comb can help you gather the section smoothly. The goal is to have the hair held steadily so you can make precise snips. It might feel a little awkward at first, but practice makes perfect. Remember, you're aiming for controlled movements, not a frantic chop.
The key here is patience. Thinning hair isn't a race. It's better to take off too little than too much, especially when you're just starting out. You can always go back and thin more if needed, but you can't put hair back on once it's cut.
Mastering the Thinning Technique
Alright, so you've got your clean, dry hair sectioned and you're ready to actually start thinning. This is where things get a little more precise, but don't worry, it's totally doable. The key here is control and taking it slow. You're not trying to hack away a huge chunk; it's more about subtle adjustments to get that weight off.
Correct Shears Placement
When you're holding a section of hair, think about where you're placing the thinning shears. You don't want to get too close to the scalp, like, ever. That's a recipe for disaster, trust me. Aim for the mid-shaft or even closer to the ends, depending on where you feel the bulk is. The idea is to remove weight, not create a bald spot or weird, choppy lines right at the top. It's about making the hair feel lighter and more fluid.
The 45-Degree Angle Approach
This is a big one. Instead of going straight across the hair shaft, you want to angle your thinning shears. A 45-degree angle is generally a good starting point. This helps the shears blend the cut hair more naturally with the rest of the section. It prevents that blunt, cut-off look that can happen if you just snip straight across. Think of it like you're gently grazing the hair, not aggressively chopping it.
Making Controlled Snips
Here's the actual cutting part. Take a small subsection of hair and hold it between your fingers. Now, position your thinning shears at that 45-degree angle. Make just a few controlled snips. Don't go crazy opening and closing the shears repeatedly on the same bit of hair. A couple of gentle cuts are usually enough. After you snip, gently comb through the section. This helps to see how the cut has affected the hair's weight and flow. It also helps to distribute the cut hairs so you can see the result more clearly. If it still feels too heavy, you can go back, but always take small steps.
Assessing Results as You Go
This is probably the most important part of the whole process. You absolutely have to check your work as you go. After each snip or a few snips in a section, comb through it and look at it. Does it feel lighter? Does it look more blended? If you're happy, move on. If it still feels a bit too dense, you can go back and make a few more very careful snips. It's way easier to add more thinning than it is to fix hair that's been over-thinned. Remember, less is more when you're starting out. You can always take more off, but you can't put it back on. For fine hair, you might want to check out some tips on thinning fine hair specifically, as it requires a lighter touch.
Tailoring Techniques for Different Hair Types
So, you've got your thinning shears and you're ready to tackle some bulk. But hold on a sec, not all hair is created equal, right? What works for my friend Sarah's super thick mane might be a total disaster for my cousin Emily's fine, wispy strands. It's all about knowing how to adjust your approach based on what you're working with. Getting this right means you'll get the results you want without accidentally making things worse.
Thinning Fine to Medium Hair
When you're dealing with finer hair, the goal is usually to remove weight without making it look sparse or stringy. You want to add a bit of movement, not take away all the volume. Think subtle. For this, you'll want shears that have more teeth – these take out less hair with each snip, giving you more control. It’s best to make just one or two careful cuts per section, focusing on the middle part of the hair shaft down to the ends. Definitely steer clear of the roots; thinning too close to the scalp can make hair look flat or even create weird gaps. It’s all about creating a softer look and a bit more body. If you're looking for ways to manage volume without shears, you might want to explore creative methods to achieve thinner-looking hair.
Managing Thick Hair
Thick hair is where thinning shears really shine. You can afford to be a bit more aggressive here, but still, slow and steady wins the race. Grab shears with fewer teeth; these are designed to remove more hair with each cut, which is exactly what you need to tackle that density. Break your hair down into smaller sections. This makes it way easier to manage and ensures you don't accidentally go overboard. Work your way through the layers, taking out just a bit at a time. You can always go back for more, but you can't put it back once it's gone! This gradual approach helps maintain the natural flow and bounce of your hair.
Texturizing Curly or Textured Hair
Okay, curly hair is a whole different ballgame. The absolute golden rule here is to always thin it when it's dry. Seriously, don't even think about doing it when it's wet. When hair is dry, you can actually see its true shape and how much it shrinks up. Use a very light hand and target only small, specific areas. The last thing you want is to create frizz or mess up those beautiful curl patterns. Focus on the outer layers and avoid cutting into the main body of the curl, as this can lead to uneven, puffy sections that are a nightmare to manage. It's about refining the shape, not removing bulk indiscriminately.
When thinning any hair type, remember that less is often more. It's easy to get carried away, but taking small, controlled snips and checking your progress frequently will save you from potential regrets. Always assess how the hair looks and feels after each step before deciding to cut more.
Here’s a quick rundown:
- Fine Hair: Use shears with more teeth, focus on mid-lengths to ends, make minimal cuts per section.
- Thick Hair: Use shears with fewer teeth, work in smaller sections, thin gradually through layers.
- Curly/Textured Hair: Always thin when dry, use a light hand, target specific areas, preserve curl definition.
Avoiding Common Thinning Mistakes
Okay, so you've got your thinning shears, you've prepped your hair, and you're ready to go. But hold up a sec! Before you start snipping away, let's talk about some common pitfalls that can turn a good hair day into a bad one. It's super easy to get a little overzealous with thinning shears, and trust me, some mistakes are harder to fix than others.
The Perils of Over-Thinning
This is probably the most frequent oopsie. When you take out too much hair, you can end up with strands that look frizzy, limp, or just plain weird. It can make your hair feel lighter, sure, but not in a good way. It's like trying to make a cake lighter by removing half the flour – it just doesn't work out. The key here is to go slow. Seriously, slow and steady wins the hair race. You can always take more out, but you can't put it back. So, make a few snips, check how it looks and feels, and then decide if you need to do a little more. It’s better to have to go back and thin a bit more than to regret taking too much off.
Why Not to Thin Near the Roots
Thinning your hair right at the scalp, especially near your roots or the crown area, is a big no-no for most people. This is where your hair naturally has the most volume. If you start thinning there, you can create these strange, almost bald-looking patches or flyaways that are super noticeable. It can also make your hair look thinner overall, even if you haven't removed much from the lengths. Stick to thinning the mid-lengths and ends of your hair. That's where you want to reduce bulk without messing with your natural shape.
The Importance of Using the Right Shears
I know, I know, they all look like scissors, right? But regular scissors and thinning shears are totally different beasts. Using regular scissors to try and thin your hair will just chop it unevenly and won't give you that soft, blended look you're going for. You'll end up with blunt cuts that are really obvious. Thinning shears, with their little teeth, are designed to cut only some strands while leaving others intact. This is what creates that gradual, natural-looking reduction in volume. So, make sure you're actually using thinning shears and not just any old pair of scissors you find in the drawer. It makes a world of difference.
Remember, thinning is about removing weight and bulk, not about creating layers or shaping your hair like regular scissors do. It's a texturizing tool, plain and simple. If you're unsure, it's always better to err on the side of caution and remove less hair than you think you need to. You can always revisit it later if necessary.
Post-Thinning Hair Care and Maintenance
So, you've done the deed and thinned out your hair. Nice job! Now, what? Giving your hair a little TLC after thinning is super important. It helps keep it looking and feeling its best. Think of it like giving your hair a spa day after a bit of a trim.
Allowing Hair Recovery Time
It's really not a good idea to go back in with those thinning shears too often. Your hair needs a break to recover and settle. Most folks find that waiting about six to eight weeks between thinning sessions is about right. This gives your hair enough time to grow back a bit and for you to see how the thinning has settled in. Plus, it helps avoid making your hair too thin or weak over time. It’s all about balance, you know?
Remember, thinning is a process. Rushing it can lead to results you might not be happy with. Patience is key to healthy, thinned hair.
Hydrating and Nourishing Strands
After thinning, your hair might feel a little lighter, but it still needs moisture. Using gentle, hydrating products is a good move. Look for shampoos and conditioners that are sulfate-free. Sulfates can strip your hair of its natural oils, which is the last thing you want. A weekly deep conditioning treatment can also work wonders, giving your hair an extra boost of hydration. And don't forget about leave-in conditioners; they're great for keeping your hair soft and manageable throughout the day.
Here are some product types that can help:
- Sulfate-free shampoo and conditioner: These are gentler on your scalp and hair, helping to retain moisture.
- Deep conditioning masks: Use one weekly for an intensive hydration boost.
- Leave-in conditioners: Apply after washing to keep hair moisturized and reduce frizz.
Minimizing Heat Styling Damage
Thinning your hair can sometimes make it a bit more prone to damage from heat styling. When you use hot tools like blow dryers, straighteners, or curling irons, they can really dry out your hair, especially if it's already been thinned. It's best to cut back on how often you use them. If you do need to style with heat, always, always use a heat protectant spray first. It creates a barrier between your hair and the heat. Try to save the hot tools for special occasions rather than making them part of your daily routine. Using smoothing serums can also help tame frizz and protect against humidity, which is a nice bonus.
Wrapping Up Your Hair Thinning Journey
So, you've learned the basics of thinning out your hair at home. It's not as scary as it might seem, right? Remember, patience is key here. Start small, take your time, and always check your work as you go. If you feel unsure, it's totally okay to stop and maybe consult a pro for the next round. Keep up with good hair care, like using gentle shampoos and deep conditioners, to keep your hair looking and feeling its best. With a little practice and the right approach, you can totally manage excess volume and get that lighter, more comfortable feel you're after. Happy thinning!
Frequently Asked Questions
Can I use thinning shears on wet hair?
It's really best to use thinning shears on hair that's clean and dry. When your hair is dry, you can see its natural volume and how it falls. This helps you figure out exactly where you need to cut to get rid of extra bulk and stops you from making mistakes that make your hair look uneven.
How often should I thin out my hair?
You should plan to thin your hair about every 6 to 8 weeks. This gives your hair enough time to recover between cuts and helps make sure you don't thin it out too much or damage it.
Will thinning shears damage my hair?
If you use thinning shears the right way and not too often, they shouldn't hurt your hair. Just be careful not to use them too much, and always follow up with products that add moisture to keep your hair healthy.
Can I thin out curly or textured hair?
Yes, you can! But it's super important to only thin curly or textured hair when it's dry. Use the shears very gently and focus on the outer layers. Try not to cut into the main part of the curl, or you might end up with frizz or sections that look uneven.
What's the difference between thinning shears and regular scissors?
Thinning shears have one blade that's like a comb (with little teeth) and one straight blade. This means they only cut some hairs at a time, making the hair look softer and blended. Regular scissors cut every single hair in the section, which can make lines look too sharp and remove too much hair all at once.
What happens if I thin my hair too close to the roots?
Thinning your hair too close to your scalp can cause problems. You might end up with weird puffy spots or areas that look too thin or patchy. It's generally safer to start thinning a bit lower down on the hair strand, like in the middle or near the ends.